
An Exit Thumbnail is one of the best practices we recommend for getting the most out of your VSL. When a viewer pauses your video, instead of seeing a frozen frame, they see a custom image — giving you a powerful opportunity to reinforce your message, present a call to action, and encourage them to keep watching or take action.
With Timed Exit Thumbnails, you can take this even further by showing different thumbnails depending on where in the video the viewer pauses — making every pause point a targeted, personalized moment.
How to Set Up Your Exit Thumbnail
Access your Video Settings — go to your video library, select the video you want to edit, and click Edit to open its settings.
Go to Marketing Settings — click the Marketing tab and scroll down to locate the Exit Thumbnail section.
Enable Exit Thumbnails — toggle the Exit Thumbnail option on. This activates the feature and reveals all available configuration options.
Set your thumbnail — you have two options for setting your exit thumbnail:
- Upload an image — upload a custom image created specifically for this purpose
- Select a frame from your video — choose a specific frame from your video to use as the thumbnail
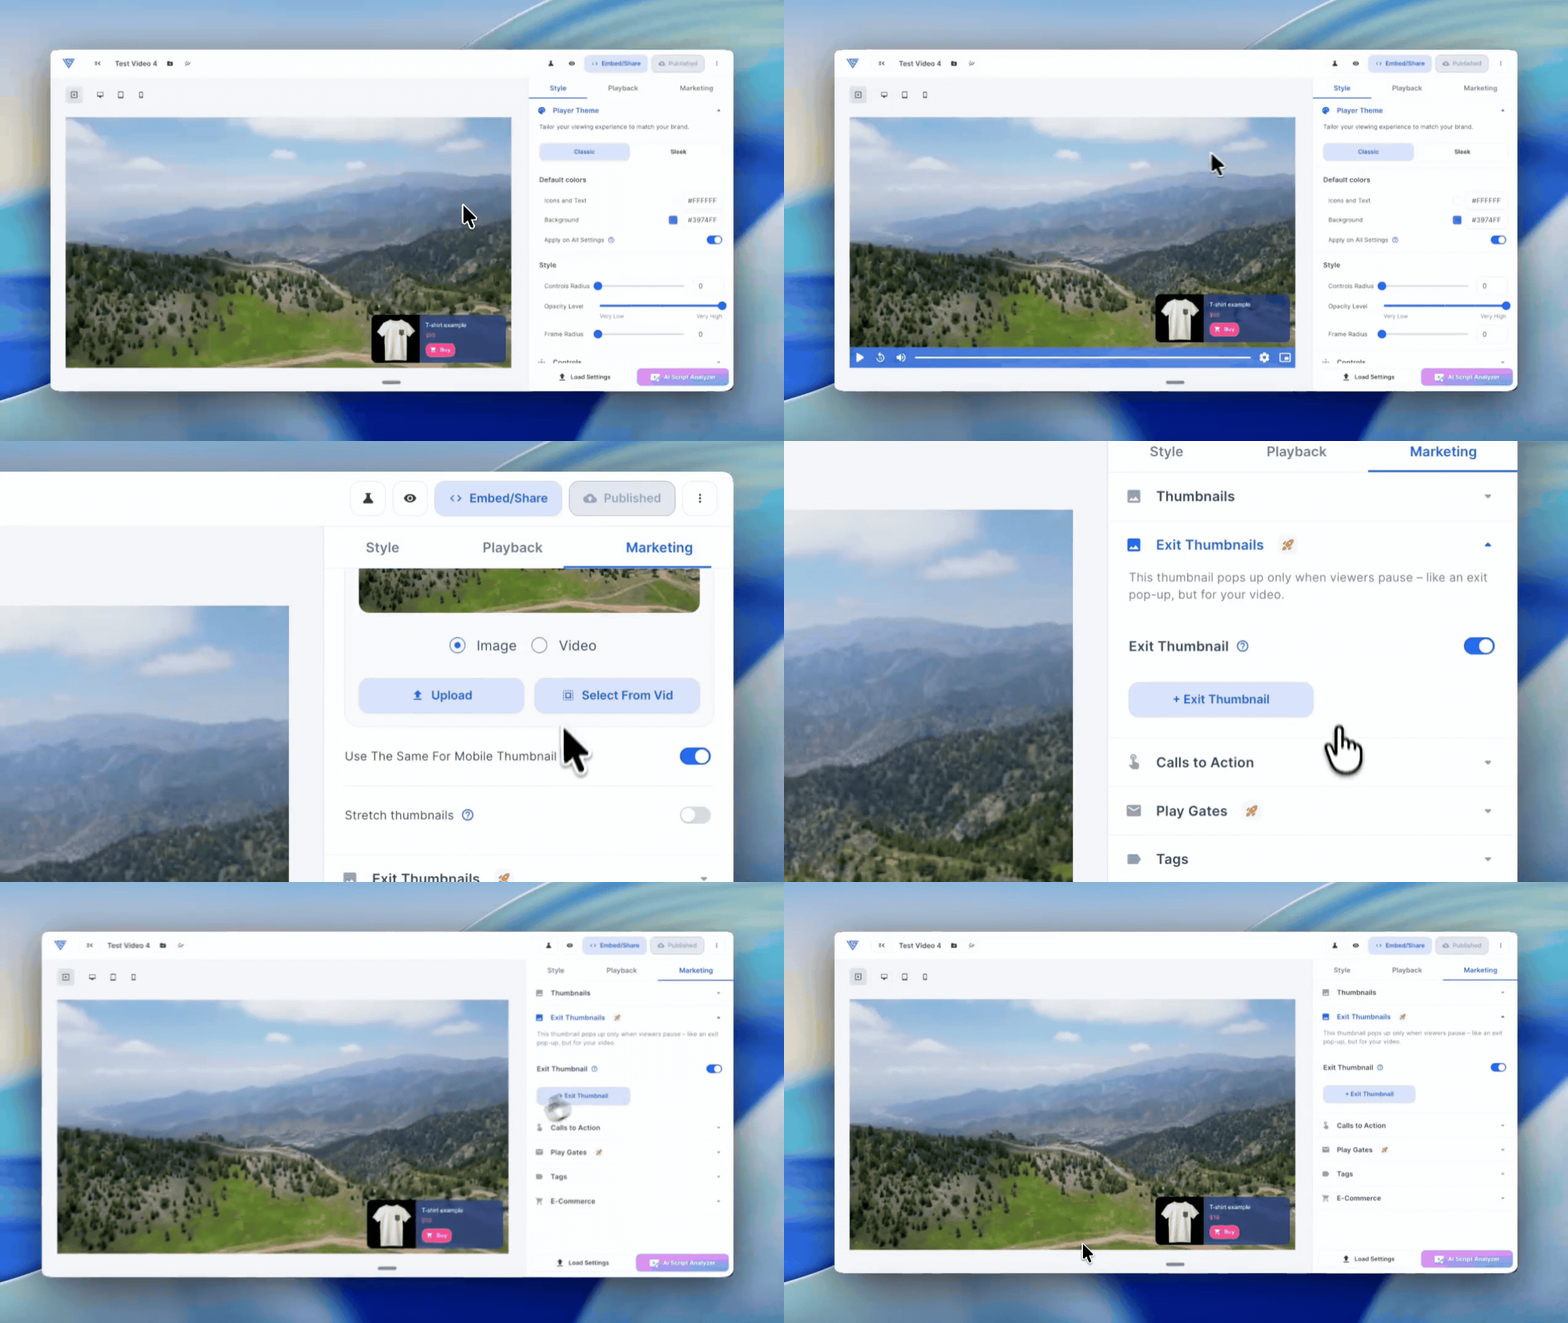
Once your image is set, click Save and Publish your video for the changes to go live.
Tip: The recommended size for your Exit Thumbnail is 1280 x 720px. Make sure to leave space in the center of your design for the play button to appear over it. You can also use animated GIFs for a more attention-grabbing effect.
Timed Exit Thumbnails — Show Different Images at Different Points
Timed Exit Thumbnails let you assign specific thumbnails to different segments of your video. Instead of one static image appearing every time the video is paused, you can show a different, relevant thumbnail based on exactly where the viewer stopped — making each pause point a tailored, high-impact moment.
You can add up to 10 timed exit thumbnails per video, each covering a defined time range.
How to Set Up Timed Exit Thumbnails
Enable Exit Thumbnails — go to your Video Settings, open the Marketing tab, and toggle on Exit Thumbnails.
Add a timed thumbnail — click Add Exit Thumbnail, then upload an image or select a frame from your video. Define the From and To time range for when this thumbnail should appear — this is the window during which a pause will trigger this specific image.
Manage prioritization — if two thumbnails overlap in their time ranges, the most recently added one takes priority. Keep this in mind when planning your thumbnail segments.
Preview your thumbnails — use Preview Mode to see exactly how each thumbnail appears at different pause points before publishing.
Save and Publish — once all your thumbnails are configured, save your settings and publish your video for the changes to go live.
Benefits
- Capture the Pause Moment — every time a viewer pauses is an opportunity to re-engage them with a targeted message or CTA rather than leaving them with a frozen frame
- Tailored Messaging at Every Stage — show a different thumbnail depending on whether a viewer pauses at the hook, the offer, or the close — making every pause point relevant to where they are in the video
- Increase Conversions — reinforce your key messages and calls to action at the most strategic moments in your video
- Easy to Set Up — the interface is intuitive and straightforward, with live preview so you always know exactly what your viewers will see
If you have any questions, feedback, or need assistance, feel free to reach out to our Customer Happiness Team at hi@vidalytics.com.